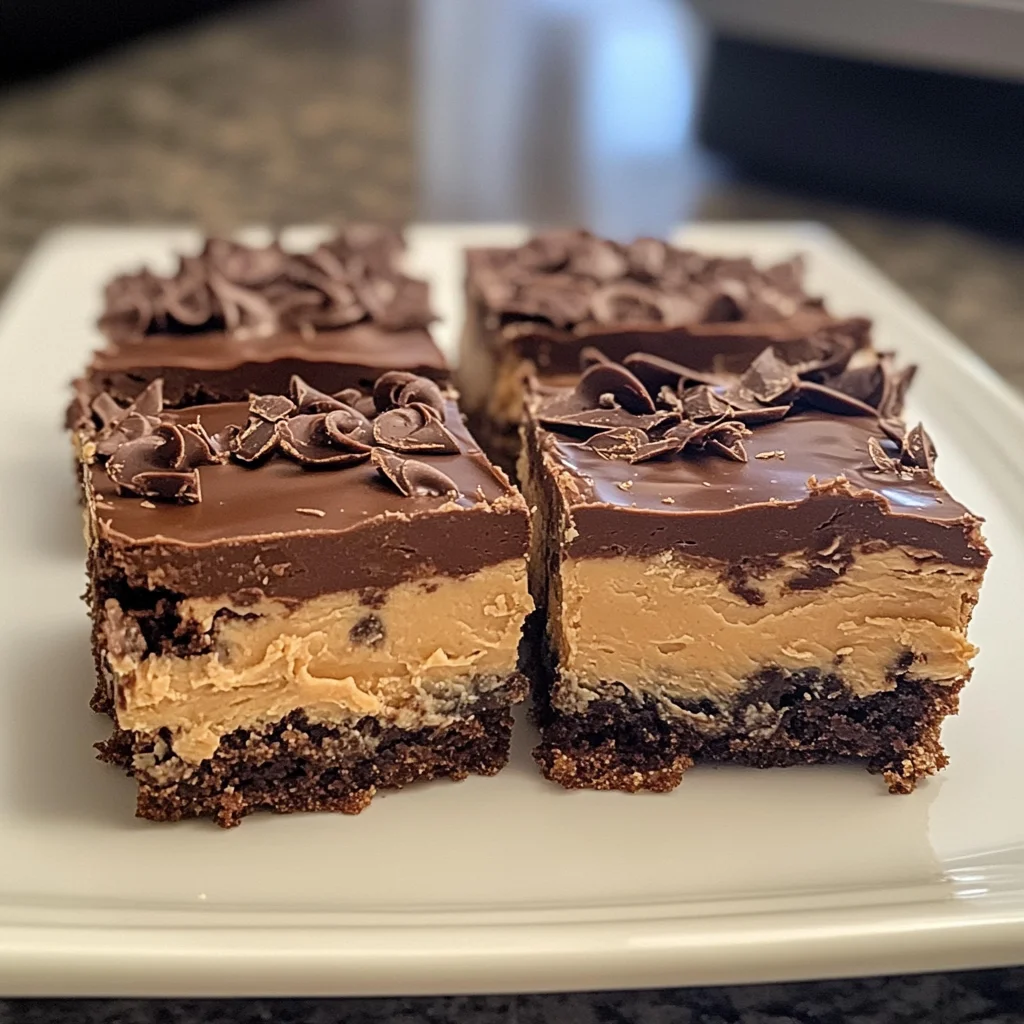
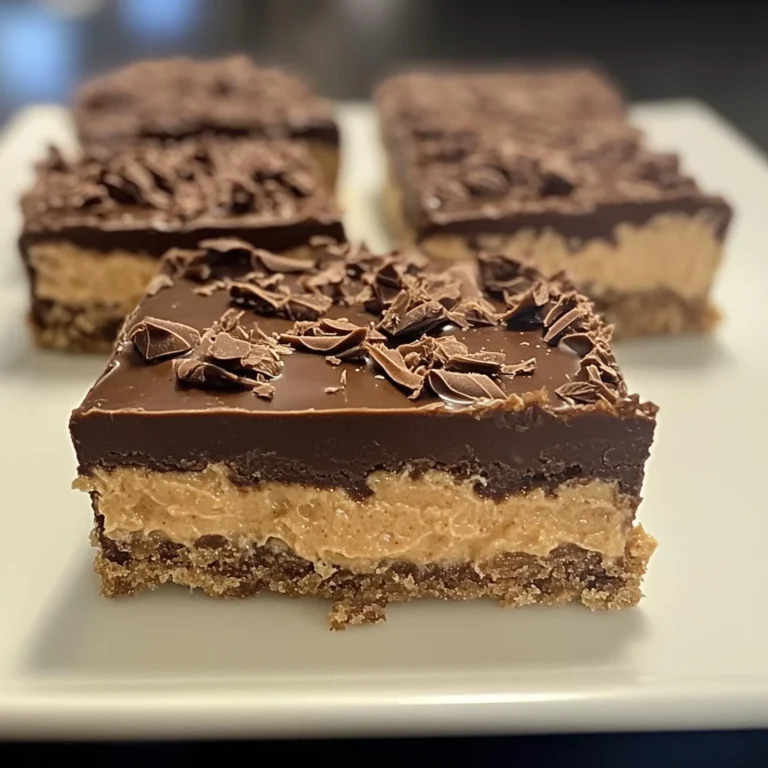
If you’re craving a dessert that perfectly combines rich, creamy layers with an irresistible crunch, look no further than these Chocolate Peanut Butter Dream Bars. These bars offer a luxurious mix of creamy cream cheese, rich chocolate pudding, and smooth peanut butter whipped cream, all perched atop a crunchy Oreo cookie crust. With a sweet, salty, and creamy combination, they’re sure to become a family favorite.
Whether you’re preparing for a special occasion or simply want a delicious treat to enjoy at home, these Chocolate Peanut Butter Dream Bars are a perfect dessert to make. The best part? They come together in no time and can be made ahead, giving you a stress-free, mouthwatering dessert. Plus, with their irresistible layers, they’ll wow everyone who tries them!
Let’s dive into the details of how to make these dream bars and why they should be at the top of your dessert list.
Why You’ll Love These Chocolate Peanut Butter Dream Bars
- Rich Flavor: A combination of creamy peanut butter and velvety chocolate pudding creates a flavor profile that’s impossible to resist.
- Multiple Textures: With a crunchy Oreo crust, creamy layers, and a fluffy whipped topping, every bite is an explosion of texture.
- Simple to Make: No baking required, which makes them a go-to recipe for any occasion.
- Perfect for Make-Ahead: You can refrigerate these bars overnight, making them ideal for potlucks, parties, or family gatherings.
These bars are an indulgence for your taste buds and an incredibly easy dessert to whip up. If you’re a fan of the classic chocolate and peanut butter combo, you’re going to love how these bars come together in such a spectacular way.
Ingredients for Chocolate Peanut Butter Dream Bars
Here’s what you’ll need to make these decadent Chocolate Peanut Butter Dream Bars. The ingredients are easy to find, and you likely already have most of them at home:
- 8 ounces cream cheese – Softened, so it mixes easily into the filling.
- 1 (3.9-ounce) box instant chocolate pudding mix – For the rich and velvety chocolate layer.
- 1 1/2 cups plus 1 tablespoon cold whole or 2% milk, divided – Milk is essential for both the pudding and cream cheese layers.
- 6 tablespoons (3/4 stick) unsalted butter – Used to bind the Oreo crust.
- 26 Oreo sandwich cookies (about 10 1/2 ounces) – These create the perfect crispy, chocolatey base.
- 1/2 teaspoon kosher salt, divided – Adds a touch of flavor contrast to the sweetness.
- 1 1/2 cups cold heavy cream – Essential for the whipped topping.
- 3/4 cup plus 2 tablespoons powdered sugar, divided – For both the cream cheese layer and the peanut butter whipped cream.
- 1/2 cup plus 1 tablespoon creamy peanut butter, divided – The star of the whipped topping.
- 1/2 (about 2-ounce) bar dark or milk chocolate (optional) – Grated for an extra chocolatey touch on top.
Step-by-Step Directions to Make Chocolate Peanut Butter Dream Bars
Now that you have all your ingredients ready, let’s get started! Follow these simple steps to create your dream bars.
Step 1: Prepare the Oreo Crust
Begin by preparing the Oreo crust. In a food processor, pulse the Oreo cookies until they are finely ground. The finer the crumbs, the better the crust will hold together.
Once you have your finely crushed Oreos, melt the unsalted butter in the microwave or on the stove. Mix the melted butter into the Oreo crumbs, stirring until the mixture is evenly combined.
Now, press this buttery Oreo mixture into the bottom of a greased 9×13-inch baking dish. Use the back of a spoon to compact the crumbs firmly into an even layer. The crust will serve as a perfect, crispy foundation for the creamy layers above.
Step 2: Make the Cream Cheese Layer
For the cream cheese layer, beat the softened cream cheese in a medium bowl until smooth. Add 1/2 cup of cold milk and 1/2 cup of powdered sugar to the cream cheese. Mix these ingredients together until smooth and creamy. This layer should be fluffy and light, and it will provide a rich, creamy base to complement the other layers.
Once it’s well mixed, spread the cream cheese mixture evenly over the Oreo crust. This layer is crucial, as it provides a luscious, tangy contrast to the sweetness of the chocolate pudding and peanut butter whipped cream.
Step 3: Prepare the Chocolate Pudding Layer
Next, you’ll prepare the chocolate pudding layer. In a separate bowl, whisk together the instant chocolate pudding mix with 1 cup of cold milk. Stir the mixture until it begins to thicken, which should take about 2 minutes. Instant pudding sets up quickly, so keep an eye on it as you mix.
Once thickened, spread the chocolate pudding mixture evenly over the cream cheese layer. This layer will be rich and decadent, adding an extra layer of chocolatey goodness to your bars.
Step 4: Make the Peanut Butter Whipped Cream
Now, let’s create the fluffy peanut butter whipped cream that will top off your bars. In a large bowl, whip the cold heavy cream with the remaining 2 tablespoons of powdered sugar and 1/2 teaspoon of kosher salt. Use a hand mixer or stand mixer and whip until stiff peaks form.
Once the cream has thickened, gently add 1/2 cup of creamy peanut butter to the whipped cream, mixing carefully until well combined. The peanut butter adds a delightful richness to the whipped cream, and it’s the perfect finishing touch for these bars.
Spread the peanut butter whipped cream evenly over the chocolate pudding layer. Make sure to smooth the top out so each bite will have a perfect balance of all the flavors.
Step 5: Top the Bars (Optional)
If you’re feeling extra decadent, you can grate some dark or milk chocolate over the top of the peanut butter whipped cream layer. This step is optional, but it adds a little extra chocolatey goodness that will make your bars even more irresistible.
Step 6: Chill and Set
Once all the layers are assembled, it’s time to chill your Chocolate Peanut Butter Dream Bars. Refrigerate them for at least 4 hours or overnight to allow the layers to set. Chilling them will ensure the bars hold their shape and let the flavors meld together beautifully.
Step 7: Serve and Enjoy!
When you’re ready to serve, cut the bars into squares. These bars are rich and indulgent, so small portions are the way to go. Enjoy the decadent combination of crunchy Oreo crust, creamy cheese, rich chocolate pudding, and fluffy peanut butter whipped cream in every bite!

Why These Chocolate Peanut Butter Dream Bars Are a Must-Try
Perfect for Any Occasion
Whether you’re hosting a party, attending a potluck, or just need a sweet treat for a weeknight, these Chocolate Peanut Butter Dream Bars are perfect for any occasion. Their beautiful layers and sweet, salty flavor combination will make them a hit with guests. Plus, they’re easy to make in advance, giving you more time to enjoy your event instead of spending hours in the kitchen.
Versatile and Adaptable
You can easily make this recipe your own by playing with the flavors. For example, swap out the peanut butter for almond butter or cashew butter for a unique twist. If you’re not a fan of Oreo cookies, you could use graham crackers or another favorite cookie for the crust.
Satisfy Your Sweet Tooth
These bars are a dessert lover’s dream. The richness of the cream cheese and chocolate pudding, combined with the light and airy peanut butter whipped cream, creates a perfect balance of textures and flavors. It’s the ultimate dessert for anyone who loves the combination of chocolate and peanut butter.
Nutritional Information
Each serving of these Chocolate Peanut Butter Dream Bars packs quite a punch in terms of flavor and calories. Here’s a breakdown of the approximate nutritional content per serving:
- Calories: 350 kcal
- Protein: 4g
- Carbs: 33g
- Fat: 25g
- Fiber: 2g
- Sugar: 20g (mainly from the powdered sugar and chocolate pudding)
While these bars are indulgent, they’re a great treat for special occasions or when you just need a little something sweet. Keep in mind that you can adjust the sweetness level by playing with powdered sugar or opting for sugar-free pudding mixes.
Frequently Asked Questions
Can I Make These Bars Ahead of Time?
Yes! These bars are ideal for making ahead. Simply refrigerate them for at least 4 hours or overnight to allow the layers to set and meld together. The flavors will only improve with time!
Can I Use a Different Cookie for the Crust?
Absolutely! While Oreos are the classic choice for this recipe, you can experiment with other cookies for the crust. Try using chocolate wafer cookies, graham crackers, or even Nutter Butter cookies for a different flavor profile.
How Should I Store Leftovers?
Store any leftovers in an airtight container in the refrigerator for up to 3 days. The bars will stay fresh and creamy, so you can enjoy them even after your first serving.
Can I Make This Recipe Gluten-Free?
If you’re looking for a gluten-free version, simply use gluten-free cookies for the crust. Many gluten-free options are available, and they work just as well in this recipe.
Can I Freeze These Bars?
Yes, you can freeze these bars! Cut them into squares and place them in an airtight container. Freeze for up to 2 months. When you’re ready to enjoy them, simply thaw them in the fridge for a few hours.
Conclusion
Chocolate Peanut Butter Dream Bars are a decadent and irresistible dessert that will satisfy your sweet tooth with every bite. Their perfect combination of creamy layers, crunchy Oreo crust, and fluffy peanut butter whipped cream makes them the ultimate indulgence. Whether you’re preparing for a special occasion or simply treating yourself to something delicious, these bars are guaranteed to impress!
If you loved this recipe, don’t forget to share your creation on social media! And for more delicious ideas, check out these other recipes you’re sure to enjoy:
Happy cooking, and enjoy every delicious bite!
Print
No-Bake Chocolate Peanut Butter Dream Bars – Quick & Tasty
- Total Time: 4 hours
- Yield: 12 servings 1x
- Diet: Vegetarian
Description
These Chocolate Peanut Butter Dream Bars are the ultimate indulgence. With a crunchy Oreo crust, a creamy layer of sweetened cream cheese, decadent chocolate pudding, and a peanut butter whipped cream topping, these no-bake bars are a dessert lover’s dream come true!
Ingredients
- 8 ounces cream cheese
- 1 (3.9-ounce) box instant chocolate pudding mix
- 1 1/2 cups plus 1 tablespoon cold whole or 2% milk, divided
- 6 tablespoons (3/4 stick) unsalted butter
- 26 Oreo sandwich cookies (about 10 1/2 ounces)
- 1/2 teaspoon kosher salt, divided
- 1 1/2 cups cold heavy cream
- 3/4 cup plus 2 tablespoons powdered sugar, divided
- 1/2 cup plus 1 tablespoon creamy peanut butter, divided
- 1/2 (about 2-ounce) bar dark or milk chocolate (optional)
Instructions
-
Prepare the Oreo Crust:
In a food processor, crush the Oreo cookies until finely ground. Melt the butter and mix it with the crushed Oreos. Press the mixture into the bottom of a greased 9×13-inch baking dish to form a crust. -
Make the Cream Cheese Layer:
Beat the cream cheese until smooth. Add 1/2 cup of milk and 1/2 cup of powdered sugar, mixing until smooth and creamy. Spread evenly over the Oreo crust. -
Prepare the Chocolate Pudding Layer:
Whisk the instant chocolate pudding mix with the remaining 1 cup of cold milk until thickened, about 2 minutes. Spread this mixture over the cream cheese layer. -
Make the Peanut Butter Whipped Cream:
In a large bowl, whip the cold heavy cream with the remaining 2 tablespoons of powdered sugar and 1/2 teaspoon of kosher salt until stiff peaks form. Gently fold in the peanut butter. -
Top the Bars:
Spread the peanut butter whipped cream evenly over the chocolate pudding layer. Optionally, grate the dark or milk chocolate over the top for extra richness. -
Chill:
Refrigerate the bars for at least 4 hours or overnight to set completely. -
Serve:
Cut into squares and enjoy these irresistible, creamy, and decadent bars!
Notes
- For an extra chocolate touch, top with chocolate shavings or melted chocolate.
- Be sure to let the bars chill completely before serving to achieve the best texture and flavor.
- If you’re making these ahead of time, they can be stored in the refrigerator for up to 3 days.
- Prep Time: 20 minutes
- Cook Time: 0 minutes
- Category: Dessert
- Method: No-Bake
- Cuisine: American
Nutrition
- Serving Size: 1 bar
- Calories: 350 kcal
- Sugar: 27g
- Sodium: 180mg
- Fat: 22g
- Saturated Fat: 10g
- Unsaturated Fat: 9g
- Trans Fat: 0g
- Carbohydrates: 34g
- Fiber: 2g
- Protein: 4g
- Cholesterol: 35mg

